Does VacuumingGet Rid ofBed Bugs?
Does vacuuming get rid of bed bugs? It helps reduce numbers but leaves eggs behind. Learn the right technique and why heat treatment is essential.
If you vacuum bed bugs after spotting bites, faecal spotting or live insects around the mattress, you’re making a sensible first move — just don’t expect suction to finish the job. It can lift away visible adults and nymphs, plus a little debris, yet eggs stay glued to seams and hiding bugs remain deep in cracks, bed heads and skirting boards where no nozzle reaches.
Put simply: vacuuming is a physical removal method that reduces bed bug numbers on accessible surfaces but cannot eliminate an infestation on its own. To actually end a bed bug problem in an Australian home, vacuuming must be paired with heat, targeted professional treatment and disciplined follow-up. This guide explains exactly what vacuuming can and can’t do, how to do it properly, what it should cost to escalate, and when to call in a licensed pest control technician.
- Vacuuming removes visible adult and nymph bed bugs but rarely dislodges the 1 mm eggs glued to fabric and timber.
- All bed bug life stages die above 50°C — a 60°C wash or hot tumble dry is the step vacuuming can never replace.
- Always seal and bin vacuum contents outside immediately, and wash the canister in hot water, or live bugs crawl back out.
- A realistic 2025-26 professional bed bug treatment in Australia typically runs $300-$1,500+ AUD depending on method and rooms.
- Vacuum every second day between professional visits, and watch for fresh faecal spotting as your early-warning signal.
vacuum bed bugs: A Growing Problem Across Australia
Bed bugs thrive in Australian conditions because our warm climate lets them breed year-round, and our housing stock gives them endless hiding spots. Unlike many pests, they aren’t driven out by a cold winter in most of the country — heated homes in Melbourne and subtropical humidity in Brisbane both suit them fine.
Housing style matters too. Older Queenslanders on stumps have subfloor voids, gaps around pipe penetrations and tongue-and-groove walls full of harbourage. Brick veneer homes on concrete slabs still offer carpet edges, skirting gaps and power-point cavities. Apartments and townhouses — increasingly common in Sydney, Melbourne and Brisbane — let infestations migrate between adjoining rooms and units through wall voids and shared wiring conduits. Understanding how bed bugs actually spread (and how they don’t) helps explain why vacuuming one room rarely contains them: they hitchhike on luggage, clothing and second-hand furniture, so the source is often reintroduced even after a thorough clean.
Add in Australia’s high domestic and international travel volume, and you have a pest that arrives quietly, establishes fast in seams and screw holes, and rebounds from just a handful of survivors within weeks. That’s the core reason a vacuum-only approach fails.
Warning Signs You Have Bed Bugs (Not Just a Vacuuming Problem)
You likely have an active infestation if you find two or more of the signs below, even if regular vacuuming seems to keep bugs “away”. Vacuuming suppresses what you see — it doesn’t stop what’s breeding in the cracks. Run this checklist around the bed, bedside furniture and skirting boards:
- Bites in lines or clusters — often on arms, shoulders and neck, appearing overnight. See our guide on bed bug bites: identification and your first steps before assuming it’s mosquitoes or midges.
- Faecal spotting — small black or rust-coloured dots along mattress piping, slats and bedhead joints that smear when wiped.
- Shed skins — pale, translucent casings from moulting nymphs, usually tucked into seams and frame joints.
- Tiny pale eggs — roughly 1 mm, pearly white, cemented to fabric and timber in clusters.
- Live bugs — flat, apple-seed-sized reddish-brown adults, often seen after lights-on at night or after vacuuming stirs them out.
- A sweet, musty odour — noticeable in heavier infestations around the bed.
If fresh faecal spotting reappears within days of a thorough vacuum and sheet change, live bugs remain — that’s your cue that DIY has hit its limit.
What Vacuuming Can and Cannot Do
Vacuuming physically removes loose bed bugs from accessible surfaces, and that has genuine value when you need to knock a heavy population down fast. What it cannot do is reach eggs or bugs hidden in voids — and those survivors are enough to rebuild the colony.
The eggs are the core problem. At about 1 mm, pale and glued firmly to fabric and timber, they rarely yield to suction. Bugs also wedge themselves into mattress seams, screw holes, bed frame joints and skirting gaps a crevice tool simply can’t enter. Because a colony can rebound from a small number of survivors within weeks, partial removal just delays the problem while giving you false confidence.
Where vacuuming helps most
Vacuuming helps most along mattress seams, bed frames, skirting boards, sofa crevices, carpet edges, and behind headboards, where crumbs, dust, pet hair, and hidden pests collect. Use slow overlapping strokes with a crevice tool, then empty the canister outside so allergens and insects are not released back indoors.
- Mattress and base seams, tufts and piping
- Bed frame joints and slat contact points
- Skirting boards, carpet edges and under-furniture cracks
- Visible clusters after a professional treatment stirs bugs out of hiding
How to vacuum bed bugs properly
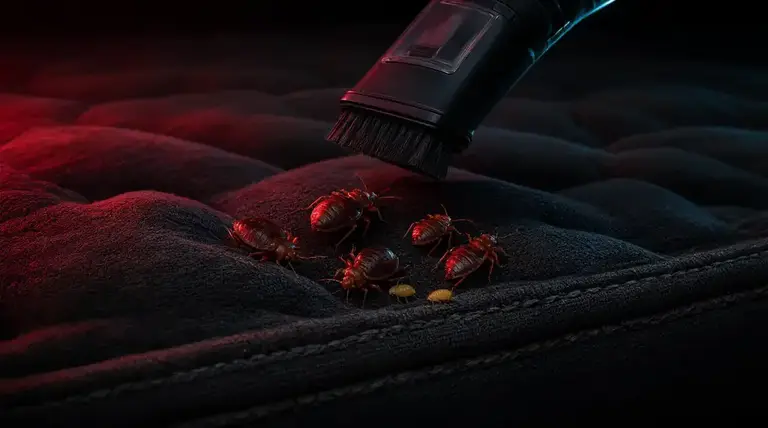
Use a vacuum with a HEPA filter and crevice tool, moving slowly over seams, tufts, bed frames, baseboards, and nearby carpet; empty the canister or seal the bag immediately into a plastic bag, discard it outside, then wash the canister and tools with hot soapy water.
| Step | Action |
|---|---|
| 1 | Use a stiff crevice tool and drag slowly along every seam |
| 2 | Scrape rough seams first to loosen cemented eggs |
| 3 | Immediately seal the bag or canister contents in plastic |
| 4 | Bin the sealed bag outside the home right away |
| 5 | Wash the canister and nozzle in hot water |
The heat step you cannot skip
Never skip heat: after vacuuming, run washable items through a 60°C wash or hot tumble dry, because bed bugs and eggs die above 50°C. Heat reaches what suction leaves behind, especially eggs. For seams and skirting, use 100°C steam slowly, keeping contact long enough to penetrate without soaking mattresses.
A realistic weekly routine during treatment
Vacuuming earns its keep as a maintenance task between professional visits. A sensible pattern: vacuum bed and room seams every second day, seal and bin the contents each time, and keep laundered bedding in sealed bags until treatment is complete. Combined with mattress encasements, this steadily strips out survivors and lets you monitor progress — fresh faecal spotting after a clean means live bugs remain.
DIY Vacuuming vs Professional Bed Bug Treatment
Vacuuming is one tool in a program, which is exactly why bed bugs are so hard to eliminate yourself. DIY controls what you can see; professional pest control treats what you can’t — the wall voids, ensemble bases and adjoining rooms where the colony actually lives. It’s also worth knowing which DIY remedies simply do not work so you don’t waste weeks on bicarb soda and essential oils while numbers climb.
| Factor | DIY vacuuming routine | Professional treatment |
|---|---|---|
| Eggs | Mostly survives suction; heat laundry helps on washable items only | Heat or targeted residual treatment addresses eggs in situ |
| Hidden harbourages | Nozzle can’t reach wall voids, screw holes, ensemble interiors | Technicians inspect and treat voids, frames and adjoining rooms |
| Time to result | Weeks to months, often with rebound | Typically 1-3 visits over several weeks |
| Cost (AUD) | Low upfront, but repeat purchases add up | Higher upfront, usually with warranty and follow-up |
| Best role | Knock-down and monitoring between visits | Eradication of the full infestation |
Bed Bug Treatment Costs in Australia (2025-26)
Across the Australian pest control industry, professional bed bug treatment generally runs between $300 and $1,500+ AUD in 2025-26, depending on the method, the number of rooms and how established the infestation is. Whole-home heat treatment sits at the top of the typical market range; targeted chemical programs for one or two bedrooms sit lower. Rates vary between metro and regional areas, and severe or multi-room infestations push costs towards the upper end of the market. For a fuller breakdown of methods, see our comparison of bed bug treatment: heat vs chemical — which works?
| Service | Typical market rate (AUD) | What’s included/notes |
|---|---|---|
| Inspection and quote | $0-$150 | Identification, extent mapping, treatment plan; some operators waive the fee if you proceed |
| Chemical treatment (1-2 rooms) | $300-$600 | APVMA-registered residuals applied by a licensed technician; usually 2+ visits |
| Heat treatment (whole room/home) | $800-$1,500+ | Single-visit lethal-temperature treatment; best for heavy or chemical-resistant infestations |
| Combination program | $700-$1,800 | Heat plus residual, encasements, follow-up inspections and warranty period |
These figures reflect typical Australian market rates in 2025-26 — what the industry generally charges, not a quote. Chemical products should always be applied by a licensed pest control technician using APVMA-registered products — no treatment can honestly be called “100% safe” or “guaranteed”, and reputable operators won’t claim otherwise.
Worth knowing: Aussie Pest Strike typically comes in well under these market rates. For an exact quote tailored to your property, call us on [aps_phone].
Seasonal Bed Bug Activity in Australia
Bed bugs are active all year in Australia, but reported activity typically climbs through the warmer months and peak travel periods, then dips modestly in mid-winter. Warmer temperatures speed up their breeding cycle, and summer holidays mean more luggage moving through hotels, caravans and spare bedrooms. The chart below shows typical relative activity levels our technicians see across the year.
Jan
Feb
Mar
Apr
May
Jun
Jul
Aug
Sep
Oct
Nov
Dec
Indicative activity pattern: bed bugs breed faster in warm weather and spread more during peak holiday travel (December-February and school-holiday periods), with a modest lull in mid-winter — but indoor heating keeps them active year-round.
Vacuuming is the first thing I tell a customer to keep doing between visits — it pulls numbers down and gives us honest feedback on whether treatment is working. But in years of treating Australian homes, I’ve never seen a vacuum clear an infestation on its own. The eggs and the bugs in the wall voids decide the outcome, and that takes heat or a properly applied residual program.
Use vacuuming as your knock-down and monitoring tool: every second day on seams, skirting and frame joints, with sealed disposal each time, plus 60°C laundry for all bedding. If you still see fresh faecal spotting, shed skins or live bugs after two weeks, stop spending on DIY and book a professional Bed Bug Treatment & Removal program — early intervention is faster and cheaper than treating a multi-room infestation.
Frequently Asked Questions
Does vacuuming get rid of bed bugs completely?
No. Vacuuming physically removes visible adult and nymph bed bugs from accessible surfaces such as mattress seams, bed frames and skirting boards, but it cannot eliminate an infestation on its own. Eggs about 1 mm long stay glued to fabric and timber, and bugs hiding deep in cracks, wall voids and bed heads are beyond the reach of any nozzle. Vacuuming must be paired with heat treatment and professional pest control to end a bed bug problem.
Why doesn't vacuuming kill bed bug eggs?
Bed bug eggs are roughly 1 mm, pearly white and cemented firmly to fabric and timber in clusters. Because they are glued in place and tucked into seams, screw holes and frame joints, suction rarely dislodges them. Heat is the reliable way to destroy eggs: all bed bug life stages die above 50°C, so a 60°C wash or hot tumble dry handles washable items, while professional heat or targeted residual treatment addresses eggs in situ on mattresses, frames and skirting.
How should I vacuum to remove bed bugs properly?
Use a vacuum with a HEPA filter and a stiff crevice tool. Scrape rough seams first to loosen cemented eggs, then drag the tool slowly along every mattress seam, tuft, bed frame joint, slat contact point, skirting board, carpet edge and sofa crevice using overlapping strokes. Immediately seal the bag or canister contents in plastic, bin the sealed bag outside the home right away, then wash the canister and nozzle in hot water so live bugs cannot crawl back out.
What should I do with vacuum contents after vacuuming bed bugs?
Never leave bed bugs in the machine. As soon as you finish, seal the bag or canister contents inside a plastic bag and place it in an outside bin immediately, because live bugs can crawl back out of an unsealed canister indoors. Then wash the canister and nozzle attachments in hot soapy water. This disposal step matters as much as the vacuuming itself — skipping it simply relocates live insects back into your home.
Why is heat treatment essential alongside vacuuming?
Vacuuming only removes what suction can reach, while eggs and hidden bugs survive in seams and voids. All bed bug life stages die above 50°C, so after vacuuming, run washable items through a 60°C wash or hot tumble dry. For seams and skirting boards, use 100°C steam slowly, holding contact long enough to penetrate without soaking the mattress. Heat reaches what suction leaves behind, which is why it is the step vacuuming can never replace.
How often should I vacuum during a bed bug treatment program?
A sensible pattern is to vacuum bed and room seams every second day between professional visits, sealing and binning the contents outside each time. Keep laundered bedding in sealed bags until treatment is complete, and consider mattress encasements as well. Watch for fresh faecal spotting after each clean — if black or rust-coloured dots reappear within days, live bugs remain and DIY has reached its limit, signalling that professional follow-up is still needed.
What are the warning signs that vacuuming isn't enough?
You likely have an active infestation if you find two or more of these signs: bites in lines or clusters on arms, shoulders or neck; faecal spotting that smears when wiped; pale translucent shed skins; tiny glued eggs; live apple-seed-sized reddish-brown adults; or a sweet, musty odour around the bed. If fresh faecal spotting returns within days of a thorough vacuum and sheet change, live bugs are still breeding in cracks you cannot reach.
How does DIY vacuuming compare with professional bed bug treatment?
DIY vacuuming controls what you can see: it knocks down visible populations and helps monitor progress between visits, at low upfront cost, but takes weeks to months with frequent rebound. Professional treatment addresses what you cannot see — wall voids, ensemble bases, adjoining rooms and eggs in situ — typically over one to three visits across several weeks. The two work together: vacuum every second day as maintenance, while a licensed technician eradicates the full infestation.
Is a property-specific inspection useful before deciding how to treat bed bugs?
Yes. Bed bug activity varies enormously between homes — apartments can share infestations through wall voids and wiring conduits, older Queenslanders offer subfloor and tongue-and-groove harbourage, and brick veneer homes hide bugs in skirting gaps and power-point cavities. An inspection by Aussie Pest Strike maps where bugs are actually living in your property, identifies the extent of the problem and shapes whether chemical, heat or combination treatment makes sense, rather than relying on guesswork after vacuuming alone.
What practical next step should I take after starting a vacuuming routine?
Once you have begun vacuuming every second day and laundering bedding at 60°C, arrange a professional assessment with Aussie Pest Strike to confirm the scale of the infestation and the right treatment method. Continue sealing and binning vacuum contents outside each time, keep clean laundry bagged until treatment finishes, and monitor for fresh faecal spotting as your early-warning signal. Combining disciplined home maintenance with targeted professional treatment gives you the best chance of ending the problem rather than just suppressing it.
Sources & further reading
Found Something
Dangerous?
Don’t touch it. Don’t spray it. Keep kids and pets clear, take a photo from a safe distance, and call us — or book a free inspection and we’ll come to you.
02 7235 0050